In my last post I shared a simple pouch made of Kraft Tex and I mentioned I wanted to make a tote bag using this interesting, slightly intimidating material.

And, that's just what I did when I had a little bit of uninterrupted sewing time over the weekend. I decided to make a super basic tote, just two simple exterior panels, two linings, and leather handles attached with nickel rivets.

The tote finished at 11" wide x 11" tall x 6" deep. I think it's a great size for an everyday tote and I wrote up a tutorial in case you'd like to make one of your own.

Before I start, let me talk a bit about the materials needed. As I already mentioned, I used Kraft Tex for the exterior and regular quilting cotton for the lining of my tote. You could, however, make this tote using any material you fancy (home decor fabric, quilting cotton, denim, or even leather). Just make sure to fuse interfacing to wrong side of your material (especially if using quilting cotton) to make it more sturdy.
Also, you could skip handles altogether and make yourself a lovely storage bucket instead.
♥ ♥ ♥
Here's what you'll need to make your tote:
1/2 yard exterior fabric (I used Kraft Tex)
1/2 yard lining fabric
1/2 yard SF101 interfacing (optional, I didn't use it as Kraft Tex is sturdy enough)
two 14" long 3/4" wide leather handles
four rivets
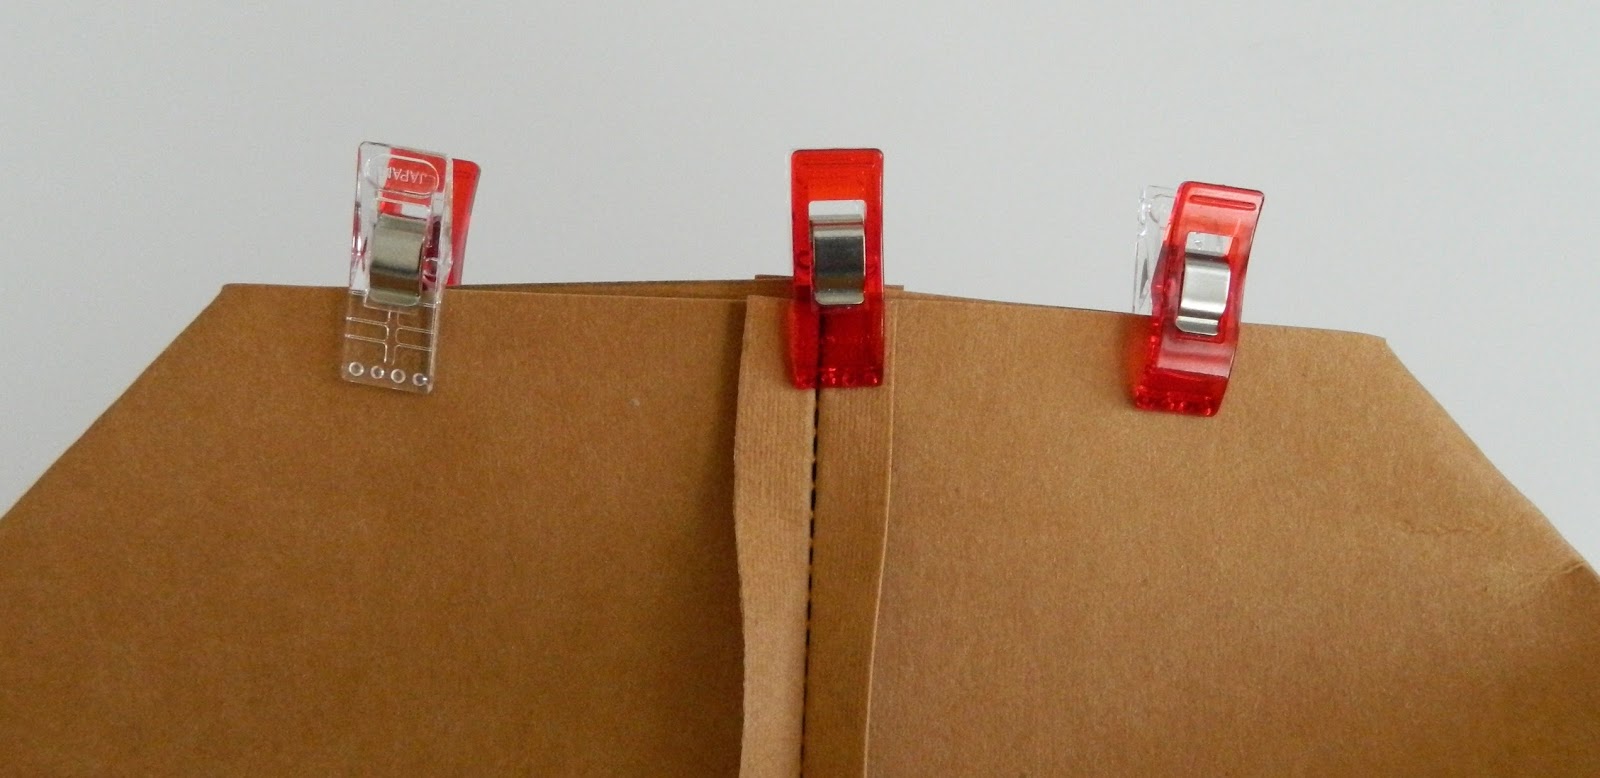
Wonder Clips (avoid using pins if using Kraft Tex or leather)
leather hole punch
1. Cutting
a) from exterior fabric cut: two 18" wide x 15" tall panels
from lining fabric cut: two 18" wide x 15" tall panels
b) Mark a 3” square along both left and right bottom corners on both lining and exterior panels. Cut the squares out using fabric scissors.


2. Exterior
a) Place both exterior panels right sides together on a flat surface. Align all four edges. Pin the panels together and stitch along the two side and bottom seams backstitching at the beginning and end. Press the seams open.

b) Align one side and bottom seam over each other to stitch the gusset (corner of your tote) closed. Clip/pin to prevent shifting and stitch along the raw edges using 1/4” seam allowance. Stitch the second gusset closed following the same directions.
UPDATE: After a bit of trial and error I found out it's much better to press Kraft tex to just one side instead of pressing the seams open.
c) Turn your bag exterior right side out. (If you're using Kraft Tex like I did, this step will be quite stressful, just go slow to make sure you don't tear the material or the stitches).
3. Lining
a) Place both lining panels right sides together on a flat surface. Align
all four edges. Pin the panels together and stitch along the two side seams backstitching at the beginning and end. Make sure to leave a 6" opening in the bottom seam (as shown in picture below). Press the seams open.

b) Follow step 2b to stitch both corners closed.
4. Final assembly
a) Insert finished exterior of the tote (right side out) into the lining (lining is wrong side out).

b) Align top raw edges as well as side seams of the exterior panel and the lining. Clip all the way around the top of the bag keeping both exterior and lining aligned.

c) Stitch all the way around the top of the bag, taking the clips out as you go. Press the top seam open and turn the bag right side out through the opening in the lining. Stitch the hole in the lining closed and gently push the lining inside the bag.
d) Smooth the top edge with your fingers clip through both exterior and lining layers to hold them in
place and topstich along the top of the tote using 1/4” seam allowance.
place and topstich along the top of the tote using 1/4” seam allowance.
5. Handles
a) Find the middle of both top edges of exterior panels, mark 2 1/2” along each side of the middle point. Now mark 1/2" down from the top edge along the 2 1/2" marks (this will be the placement of your rivets).
b) Use leather hole punch to make a hole through both exterior and lining through the marks from previous step.
c) Make a centered hole 1/2" from each short edge on leather handles as well.
d) Attach your leather handles using rivets. (my rivets were slightly longer than needed so I added a little leather square to lining side of the tote as well to make them nice and snug)

All finished. You're now ready to take your new tote out for a spin :).
Hope you give this simple tote a try. And, as always, if you make a project using any of my tutorials please add it to my Flickr group or use #sotakhandmade if posting on Instagram. I love seeing all your amazing creations.
Happy Monday. Svetlana