Wednesday, May 15, 2013

patchwork placemats


Yay, I finally made placemats for our kitchen table. I don't know why I procrastinated so much, these were a lot of fun to make and came together rather quickly.


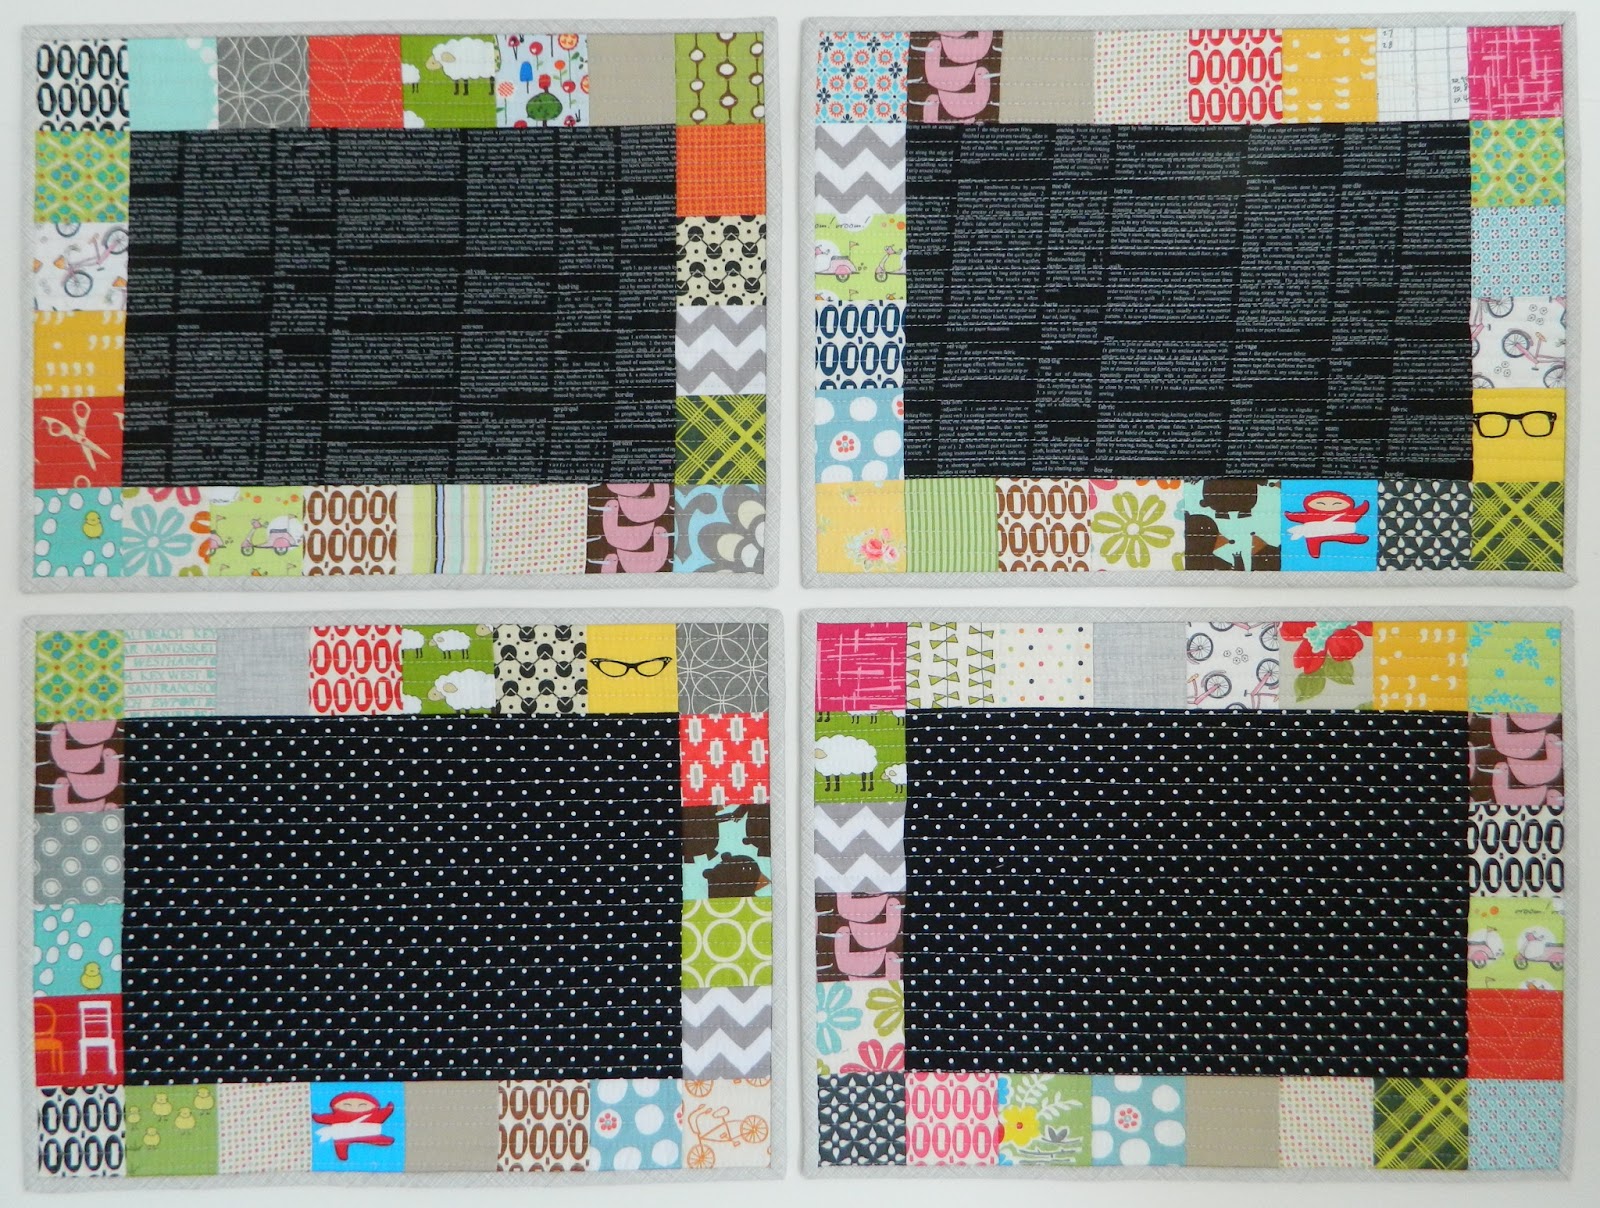
As much as I like seeing light colored placemats people make, I chose dark fabric for the centers simply because it's so much easier to keep them "clean looking". Stains do camouflage so well on darker fabric :)


I used 2.5" squares to border the main  fabric and I loved choosing and fussy cutting these prints. My 7 year old son claimed this placemat for himself as it had the most of his favorite prints.


I used home dec weight fabric for the backing and did simple straight line quilting about 1/2" apart.


I then bound them the way I would a quilt, the only difference being I cut my binding 2 1/4" wide instead of the usual 2 1/2".

I hand stitched the binding on which I might regret later since these will probably see a lot of washing machine action :) I do, however, love the look of hand stitched binding so all the extra work would definitely be worth it.
Each placemat finished at 12" x 16.5".

♥♥♥♥♥♥♥♥♥♥♥♥♥♥♥♥♥♥♥♥♥♥♥♥♥♥♥♥♥

In case you'd like to make placemats of your own, here's a quick tutorial.


Arrange 24 - 2.5" squares around 8.5' x 12.5" center fabric.


Piece the top and bottom sets of 6 - 2.5" squares, press the seams, and attach them the the two 12.5" sides of the center fabric.


Piece the two remaining sets of 2.5" squares together, press, and stitch to the sides. 

Make sure to use a consistent 1/4" seam allowance so everything matches up nicely once you stitch the side patchwork to the main fabric.

All you need to do now is make a quilt sandwich using insulbright or batting of your choice and backing fabric. Quilt as desired and bind.

That's it! Easy peasy, right?

Thanks so much for stopping by. Svetlana

25 comments:

  1. gorgeous! Clever using dark fabric and love the fussy cutting :)

    ReplyDelete
  2. They are lovely. I made some similar ones for my friend a while ago, but never made any for myself...must do that soon. Have a nice day. Tx
    http://www.flickr.com/photos/cottilello/7091395761/

    ReplyDelete
  3. I finally made some placemats for us as well, but I went a quicker way & used whole prints for the front/backs. I needed quick gratification.:) I absolutely adore yours though!!!! They are so "you"!!

    ReplyDelete
  4. I love them. They are so fun looking.

    ReplyDelete
  5. So pretty! I hope your kids aren't messy eaters!! Jxo

    ReplyDelete
  6. I love the dark centers! What a great idea to add some contrast and hide stains.

    ReplyDelete
  7. I would have been fighting for a texty one, I love to read while I eat :oD

    ReplyDelete
  8. I love them! I got all excited when I kept reading and saw the tutorial !!these would make great gifts for my family ..thank you. !

    ReplyDelete
  9. Very nicely done. Dark fabric is definitely the way to go!

    ReplyDelete
  10. Fabulous placemats - I really need to make a set of these for our family.

    ReplyDelete
  11. These are so cute!! Does the text in the center say anything interesting? That would be kind of fun, and would keep my new little readers busy during breakfast :-)) !!!

    ReplyDelete
  12. Those are great - and great idea to use the dark fabric.

    ReplyDelete
  13. Love your placemats! Thanks for the tutorial :)

    ReplyDelete
  14. Wonderful idea setting the dark text in the middle - looks very decorative!

    ReplyDelete
  15. These are just gorgeous. Hmmmm, I think I might just have to bump this closer to the top of I want to make list.

    ReplyDelete
  16. Super nice! You will sure enjoy using those!

    ReplyDelete
  17. These are really cute. I'm a bit procrastinator too!

    ReplyDelete
  18. They will cheer up the table no end even with the dark fabrics in the middle. That part is mostly covered anyway when you use them.

    ReplyDelete
  19. Beautiful! How smart to use dark fabrics in the middle. ;o) Thanks for sharing such a sweet project, Svetlana.

    ReplyDelete
  20. Svetlanko, ty prostirky jsou uzasne!!! A dekuji za tip! :) U nas maji prostirky jenom deti a kazda je jina - tvuj prispevek me presvedcil, ze je na case usit nove a stejne :) At k sobe oba pekne ladi :)

    Mej se krasne, krasny vikend, Jola

    ReplyDelete
  21. Hi Svetlana, just wanted to let you know that I have been totally inspired by your placemats and have just put a post up on my site referencing you.

    Thanks so much for the inspiration!

    Twotoast

    ReplyDelete
  22. I love it and my family be delighted as well!!! Thank you for the tutorial! With besteht regards near by Cologne / Germany

    ReplyDelete
  23. Super cute and might have to make me a few!

    ReplyDelete
  24. Thank you for sharing love these xx

    ReplyDelete
  25. Love them! I am a beginner quilter and was looking for an easy pattern to make place mats for my daughter. I had bought some Arizona print material that was just waiting for a nice, fun pattern...And this fits the bill perfectly! Thank you very much for sharing!

    ReplyDelete

Related Posts Plugin for WordPress, Blogger...